Introducing PostGIS Preview
I’ve been working with PostGIS quite a lot lately, and found myself faced with the problem of being able to easily visualize the results of my queries on a map. CartoDB has spoiled me with a big fat SQL pane and a slippy map that instantly shows you the results of your query, and allows you to iterate quickly and tune your queries to suit your needs. It’s a great workflow, and I found myself wanting for it after standing up PostGIS locally.
#postGIS people, is there is “Preview” tool that will allow for quick rendering of geoms on a map (a la @CartoDB)?
— Chris Whong (@chris_whong) April 21, 2016
I got quite a few responses. Some recommended CLI tools that render maps in the terminal, some proposed programmatically sending the results to geojson.io, some said to use QGIS (but you still have to click a few times to specify the geom column and add the layer, then you would need to delete it before starting the next iteration).
A few minutes later, it occurred to me that this would be super simple to build with leaflet and node.js, so that’s what I did. I’ll spend the rest of the blog walking through how it works
@WMattGardner Meh, will just make a node app to get geojson and throw it in leaflet
— Chris Whong (@chris_whong) April 21, 2016
Here’s a basic architecture diagram. The backend is a simple node.js server that talks to the database and sends the response data to the frontend. The frontend at its simplest is a leaflet map and a textarea to write SQL into. 
The Node App
The Node App is a super-simple express.js api with a single endpoint, /sql. This endpoint expects a PostGIS Query as a URL Parameter “q”.
This query is then passed to pg-promise, which sends it along to the database.
//expose sql endpoint, grab query as URL parameter and send it to the database
app.get('/sql', function(req, res){
  var sql = req.query.q;
  console.log('Executing SQL: ' + sql);

  //query using pg-promise
  db.any(sql)
    .then(function (data) { //use dbgeo to convert WKB from PostGIS into topojson
        return dbGeoParse(data);
    })
    .then(function (data) {
        console.log("DATA:", data);
        res.send(data);
    })
    .catch(function (err) { //send the error message if the query didn't work
        var msg = err.message || err;
        console.log("ERROR:", msg);
        res.send({
            error: msg
        });
    });
});
When the response from the database comes back, it is passed into dbgeo which transforms it to topoJson. The Topojson is then send as the response to the browser. (Topojson is used instead of geoJson to make the size of the response smaller as we have to get everything into the browser to render it on a map)
function dbGeoParse(data) {
    return new Promise(function (resolve, reject) {
        dbgeo.parse({
            data: data,
            outputFormat: 'topojson',
            geometryColumn: 'geom',
            geometryType: 'wkb'
        }, function (err, result) {
            if (err) {
                reject(err);
            } else {
                resolve(result);
            }
        });
    });
}
That’s about it, the whole backend is 60 lines of code plus dependencies!
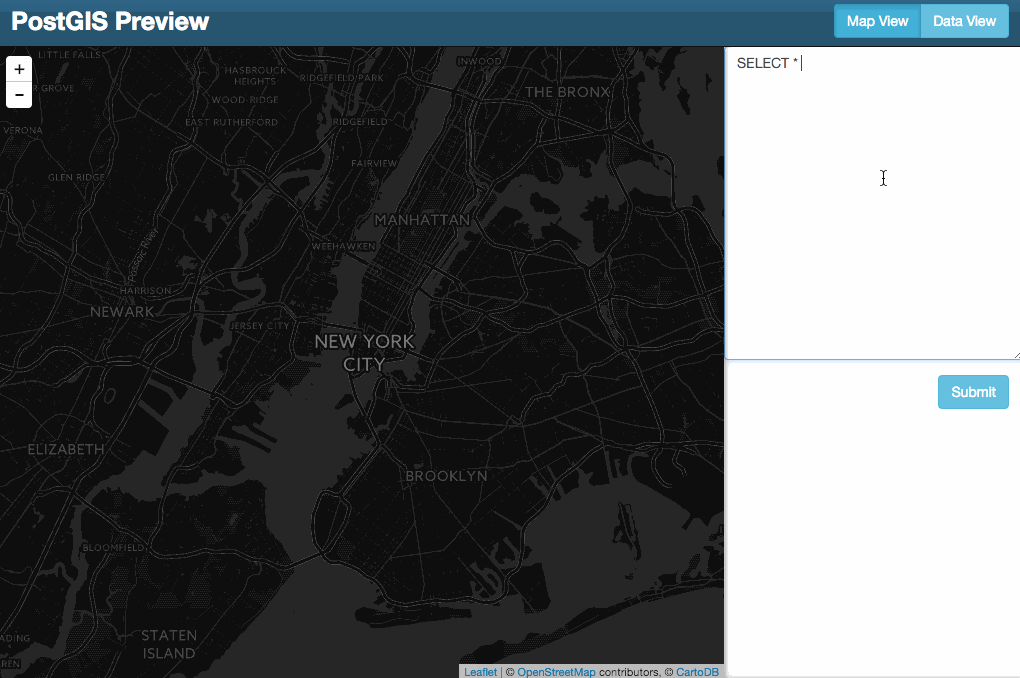
The Frontend
On the frontend, we have a single HTML page with a leaflet map and a textarea to write your SQL in.
When you click the submit button after entering a query, it is sent to the backend as a URL param using Jquery’s getJSON() method.
      //listen for submit of new query
      $('form').submit(function(e) {
        e.preventDefault();

        clearTable();

        var sql = $('#sqlPane').val();

        //clear the map
        if( map.hasLayer(layer)) {
          layer.clearLayers();
        }

        //pass the query to the sql api endpoint
        $.getJSON('/sql?q=' + sql, function(data) {
          console.log(data)
          if(!data.error) {
            //convert topojson coming over the wire to geojson using mapbox omnivore
            var features = omnivore.topojson.parse(data); //should this return a featureCollection?  Right now it's just an array of features.
            addLayer( features ); //draw the map layer
            buildTable( features ); //build the table

          } else {
            //write the error in the sidebar
            $('#notifications').text(data.error)
          }
        })
      })
The topojson response is processed using omnivore, a great little JS library by mapbox that can convert various geospatial data formats. The output is geoJSON geometries that can be rendered in Leaflet using L.geoJson().
      function addLayer( features ) {
        //create an L.geoJson layer, add it to the map
          layer = L.geoJson(features, {
            style: {
                color: '#fff', // border color
                fillColor: 'steelblue',
                weight: 1,
                opacity: 1,
                fillOpacity: 0.7
            },

            pointToLayer: function ( feature, latlng ) {
              return L.circleMarker(latlng, {
                radius: 4,
                fillColor: "#ff7800",
                color: "#000",
                weight: 1,
                opacity: 1,
                fillOpacity: 0.8
              });
            }
          }).addTo(map)

          map.fitBounds(layer.getBounds());
          $('#notifications').empty();
      }
Here it is in action:
No frills, just sweet, sweet geometries on a slippy map. I’ve since added a data view using bootstrap datatables. Some other enhancements I’d like to add:
– Add Codemirror instead of a text area for pretty SQL formatting.
– Use localstorage or something to store the last n queries so you can recall them later.
– A simple popup for each geom to show all of the associated attributes
Pull requests are welcome! Here’s the code on github. Please give it a try and tweet at @chris_whong to let me know what you think.
Leave a Reply